Building my Dev Blog
Wondered how to set up a blog-like experience using GitHub? Wondered what makes this site tick? Or how I write my posts and schedule them using CI/CD? Well today I'll be going over just that: how I coded this dev blog, that's hosted as a GitHub repo, rendered with Jekyll and deployed using CI/CD in the form of GitHub Actions to automate scheduling, sorting and publishing. Mostly coded in JavaScript, but there's some Ruby hidden in here too, some Bash to generate new post templates using CLI and YAML to help guide GitHub Actions to deploy scripts on push.
First Steps
Before coding the site, I had to decide what I wanted the site to do. I had a fair idea of my folder structure already with categories as folders such as raspberrypi, webdev, etc. and I wanted an easy to manage blog, something I could write a few posts for, place them in a "scheduled" directory, then when the time comes automatically push that post to the website and publishes it. However I wanted it to be sorted by category on push, and have either links or buttons that update on the website dependant where you are, such as the index.html so I needed to take this into consideration. I decided those two features will be enough for now, and if I write a script for post templates I could make writing blog posts easy to do and fully automated. So that's the folder structure sorted and an idea of what we want the code to do, now I needed to consider the visual aspect of the site and I very quickly fell into the idea of using the same style as GitHub, mainly because it's where it will be hosted so it will flow nicely, it's simple and pleasing as well as easy to replicate. While I was on my own GitHub, I took note of the shields I use in my README. These would be perfect as a quick and easy, as well as visually appealing and impactful design for the blog. Great for navigation, listing important items, links to posts... so that was that sorted. I would replicate what I saw on my GitHub README and have it seamless and flowing, eventually I would also match my own website (shameless plug) with the same style format, which has created a completely seamless transition throughout my GitHub, Dev Blog and personal website.
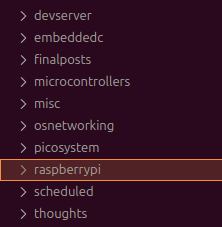
File system structure.
CI/CD with Jekyll & GitHub Pages
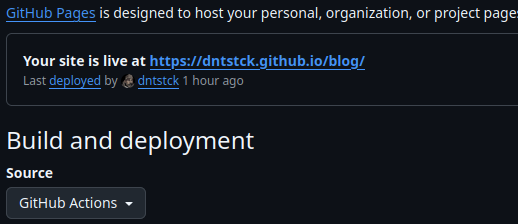
GitHub Actions
Knowledge in hand of what I wanted the site to achieve, I set out trying to figure out GitHub Pages and Jekyll, after a few failed attempts and lots of what's up doc, I got a very basic site working and deployed with Jekyll. Jekyll is a neat little framework that allows Markdown files to be published and displayed as HTML files which is perfect for blogging and for our purposes. Markdown is easy to use, easy to implement and it also goes hand in hand with HTML, even in the same file allowing HTML to be encoded directly into your .md file. GitHub Actions is a CI/CD (Continuous Integration/Continuous Deployment) tool that will allow us to automate our scripts and deploy the site on an action, such as when we push new posts to the repo.
Now implementing the JS scripts with the deployment was going to take some figuring out, I assumed it done it with some sort of config yml (later proven true) but for now I was more set on getting some JavaScript written down. Basic scripts were written out such as generating RSS but they achieved little yet, as there was no site to run them on. However the main basis is there:
Jekyll will manage the website
GitHub will host the website
GH Actions will deploy our website & automate scripts accordingly.
JavaScript will serve as the main development language, with room for assistant languages, ruby etc
Delving into YAML/YML
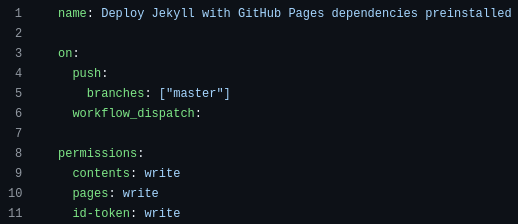
Quickly discovering that GH Actions uses YAML scripts to work, I checked them out, I've never really had much experience with YAML but it was simple enough to follow along so I made use of the already generated jekyll-gh-pages.yml to have a peek of how it's constructed and the syntax
_config.yml file for Jekyll.
Ok, not too bad. It looks a bit like Ruby with Python whitespace. I'm not a fan of Python, I just don't vibe with it even though I appreciate it's power as a scripting language and it's usability, I just don't get on with it. I'm definitely more of a JavaScript, PHP, Lua and C kinda guy. I'd definitely like to give MicroPython a go at some stage, as I have lots of Microcontrollers (usually I use C), but that's a story for another day. Once the scripts are down, I'll look into writing these YML files out so they trigger when anything is pushed to the repo. I will also have one trigger at a certain time, using cron so I can schedule posts, leave them in the scheduled directory and they will post at the desired time, no matter what because the scheduled posts will be hosted on GitHub, meaning my computer can be off and I won't have to lift a finger.
We should take note of the workflow_dispatch: trigger here in the YML. These triggers as I learned through trial and error let GH Actions know you wish to run the workflow manually which is essential for testing, rather than waiting for a certain time to pass such as midnight, or forcing a deployment through an action such as a push to the repo.
Site Design
So I got round to getting the dev blog styled to look like GitHub and replicated it in my css, then using shields.io shields, created a nabvar and a footer, with space as a body seperated by horizontal rules hr. These shields are awesome as well as super effective for most applications, you can even host them with your own container and they have very simple syntax that's easy to remember. I will post a few here so you can look at them, see how they work and potentially use them yourself.
HTML:
< img src="https://img.shields.io/badge/Badge%20Example-151515"/>
Simply replace Badge%20Example with your text, using %20 for spaces. Colour is seperated by a hypen, supporting 6 digit RGB Codes. other options include using a logo, and even custom colours for logos:
HTML:< img src="https://img.shields.io/badge/Badge%20Example-151515?logo=github&logoColor=purple"/>
Neat, we can use the GH logo and style it any colour we want. I stuck with mostly GH colors across the Dev Blog, but incorporated some Ubuntu Orange, as a nod to the OS I use daily and a custom purple tint that I use for my custom Vim theme, ubuntu.vim in honour of both.
That's pretty much it! I kept the design very simple for now, it doesn't need flamboyance at the minute as I'd rather work on getting it up and running, then writing content.
Scripting & Automation
Writing the scripts was fairly straight forward, a full rundown of what I developed can be seen in the repo but a shortened version is that the JavaScript checks each category dir (cm5,raspberrypi,devserver,webdev etc) for a Markdown file, scans that file for a piece of markdown code at the top, then sorts and publishes that file depending on it's tags. Feel free to check it out, it's around 150 lines and fairly straight forward to understand. Lot's of documentation was read in the process and I learned a lot, I also enoyed writing it, testing it and it finally working, even though I did encounter lots of bugs.
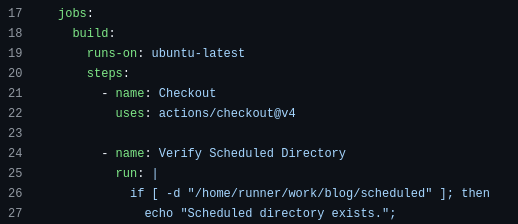
I set up this script to run whenever something is pushed to the repo. To do that, I modified the workflow (jekyll-gh-pages.yml) file in ./github/workflows directory ensuring I made use of the workflow_dispatch: trigger, as seen here:
jekyll-gh-pages.yml
Here, we build and check the scheduled directory exists, if it doesn't it will create it. However it should always be there as we have placed a .gitkeep file there to prevent GitHub from ignoring empty dirs.

jekyll-gh-pages.yml
Listing the files before moving them, if the script finds suitable files in the scheduled dir, it will list them
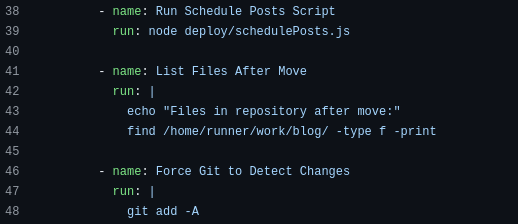
jekyll-gh-pages.yml
Forcing GitHub to detect changes, scripts need to run regardless of there being any actual changes in the repo.
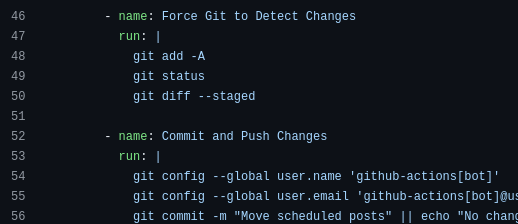
jekyll-gh-pages.yml
Commiting and pushing the changes, this ensures files get moved and everything syncs properly
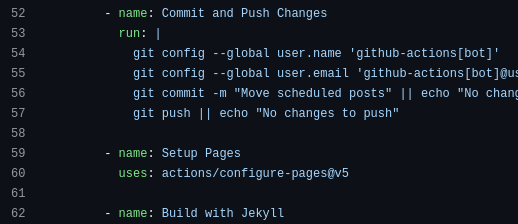
jekyll-gh-pages.yml
Success, build and deploy the site with Jekyll.
However, what if we can't deploy to GitHub? What if we are away from the computer and we want a post to publish?
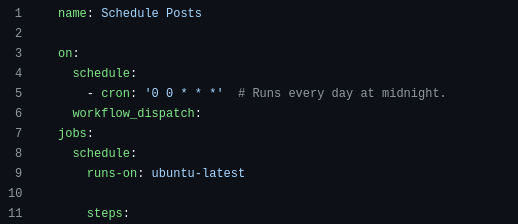
schedule.yml
That's easily done by creating another workflow file named schedule.yml in our /.github/workflows/ directory. Here we simply set it up using cron, with the on: and schedule: triggers. 0 0 * * * is the 0 minute and 0 hour, with * * * being any day of the week. cron is very useful, if you aren't familiar with it I implore you to look into it.
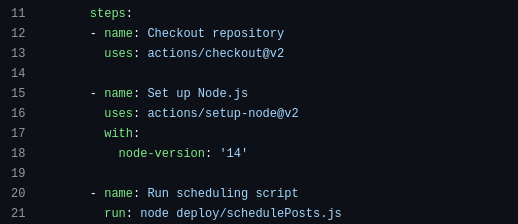
schedule.yml
Here, our workflow file points to the schedulePosts.js file, triggering it to run at midnight.
Bugs!
I encountered so many, so many. I won't even go into it here, although the commit history probably does it justice. I had lots of issues with Jeykll and the rendering of markdown to such an extent that I figured out that using a mix of HTML and Markdown as blog posts would solve the rendering issues. It does and it works well, I now write the posts in HTML which in turn gives me full control of the content, keeps my HMTL skills polished and keeps the Markdown, which is used for sorting the file on push, seperate from each other. It took some figuring out and lots of coffee, but I found a solution in the end.
Commits & Workflow runs: over 9000
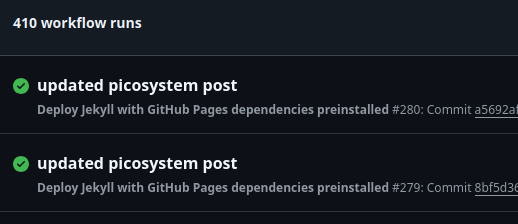
400+ Workflow runs
Adding New Features
After getting the schedulePosts.js script fully working and moving files into specific dirs depending on their tags (with lots of console.log), I decided to implement a new feature: Generating shields in each respective dirs category index.md with all the posts that are currently in that directory. It would make navigating the blog easier and list all posts by category. This would also save time in implementing a search function, as all posts can be easily found simply by clicking their tag in the navigation bar that's visible across the blog, no matter where you are.
Regretting It
After writing it and trying to implement it by checking out to a branch named new-features, testing it, seeing that it worked I merged it and everything suddenly stopped working! I couldn't figure it out, I stayed up for hours trying to fix it. Eventually I gave up and gave it a rest and decided to take a break and come back the next day with a fresh pair of eyes.
Rollback & Success
After rolling back and some more tinkering, I finally figured out the issue, the scheduler script does not push files if the tag in the frontmatter has a Capital. Quickly changed it and everything was working again. Success. Nearly done!
Bash Script
Finally, I decided on a Bash script to help me generate a new template for blog posts, it runs off command line and you simply invoke it with a post title/filename and a tag. Lowercase for the tag is preferred as the JavaScript that sorts the post does not play well with capitals, even though I have already implemented a failsafe for that, because it was something that caused me to pull my hair out and when I finally discovered it I made sure the tag is converted to lowercase before being sorted into a directory.
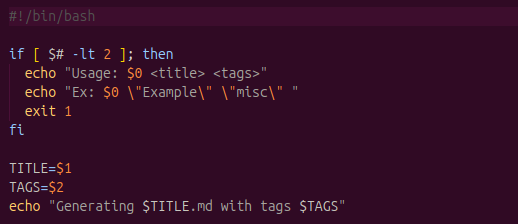
new.sh
Here, we echo what the script does if it is invoked without arguments. When invoked, it starts the script and echoes the result of the agruments to the console.
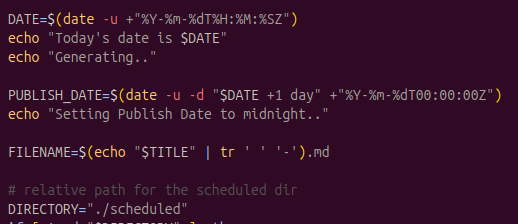
new.sh
Set a var for todays date, retrieve said date and then echo it. Do the same for the publish date, but set it to midnight, this prevents a newly scheduled post being published accidentally, or gives time to write content. Set a var for the path for the scheduled dir and as you can see from the next image, if it doesn't exist, create it.
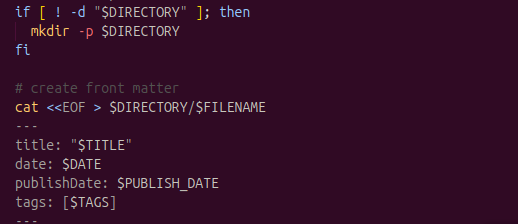
new.sh
Here we create the front matter for the new blog post, this is essential as the JavaScript relies on it to find, sort and publish the file.
new.sh
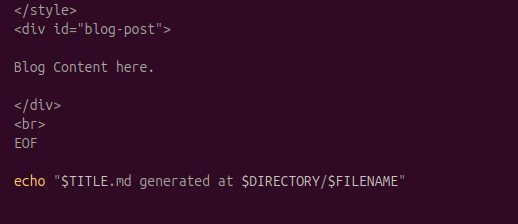
Pardon the style tag, this was part of a small workaround to fix the CSS but it is no longer needed and I forgot to remove it. The div tag is a workaround too, as I was running into rendering issues, also removed now. But ignoring that, this is the end of the script, and the end of the file that's going to be generated. Echoed is the directory it's generated in and it's filename, the script is invoked by simply running bash new.sh in the terminal, after making the script executable with sudo chmod +x new.sh
Images & Mobile functionality
The blog should be fully functional now and it also looks good on mobile devices as I wrote it in mind. For images, I will take them with my phone, transfer them to icloud, convert them with a script I wrote for ImageMagick and it will automatically convert all images in whatever directory the script is in to 480x320. this is perfect for both desktop and mobile devices as it's still small enough for mobile devices, but big enough to read on a desktop. This applies to screenshots using Ubuntus nifty screenshot tool too. I am curently considering a more optimised way of doing this, but it suffices for now.
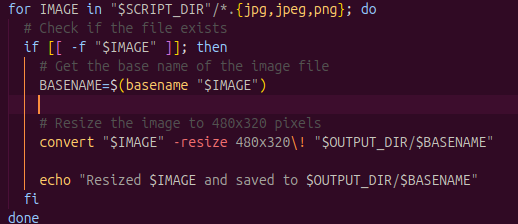
resize.sh
Well that's it, EOF! now we have a blog-like experience that's hosted on GitHub Pages, as a GitHub Repository that's fully automated with CI/CD using GitHub Actions and Jekyll as a site renderer, which generates shields automatically and inserts them in their respective index.md's where needed. Some feat, that. Thanks for following along if you made it to the end or, if you succeeded in making something similar, awesome! catch you next time!
- Dru