Unveiling the Compute Module 5: A Journey Through Innovation
Over the past two weeks, I’ve been diving deep into the capabilities of the Compute Module 5 (CM5). From setting up a couple of IO boards, installing NVMe, throwing together a case or two (because The Pi Hut ran out of stock on the day I went to order, typical!) and eventually setting up a Development Server that utilizes sandbox environments and remote editing, this journey has been nothing short of fascinating!
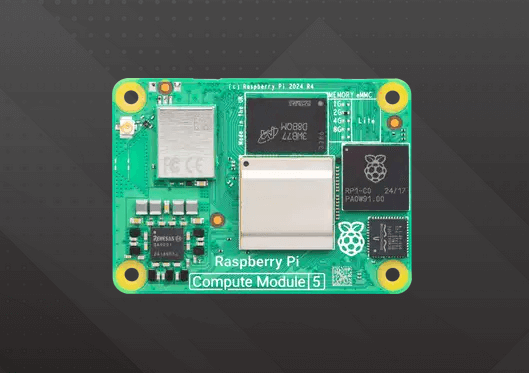
I’m sort-of new to microcontrollers and embedded systems but I’ve always been fascinated by them. One of my goals in programming is becoming an embedded developer to some extent, even just as a hobbyist. I’ve always known of the Raspberry Pi, yet I never looked into it and more fool me for not doing so because it seems like I’ve missed out on quite a fair bit. After delving deep, realizing the potential of these SBCs, SOMs, and Microcontrollers, buying a few Picos to play around with (which I enjoyed immensely), I put some money aside and waited until the new year. My birthday is a day after New Year’s Day, so it was the perfect time to buy a mid-range CM5 and a few other bits and pieces I wanted to tinker with (there’s a post coming for that). I did intend on buying the Pi 5, but after careful consideration, I decided on the Compute Module 5 because of its improved capabilities. It errs more to my side of development rather than general use, and as the CM5 is a drop-in replacement for the CM4, I reasoned it’d be best to buy a CM5 as most of the CM4 kit is backward compatible. Very glad I did too! I’ll post the specs at the end of this post for those that are interested.
Initial Setup
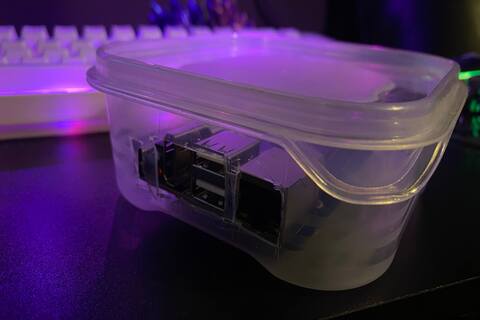
My first step was setting up an IO board with the CM5, complete with a 128GB NVMe drive and Power over Ethernet (PoE) for streamlined power. After a few hours of tinkering and building DIY cases (since I wasn’t keen on running the CM5 bare), I managed to get the CM5 up and running with the 64-bit Raspbian OS. Yet I couldn’t get PoE to work. My switch was on (supports PoE), had the right voltage, and I used a brand-new Cat5E Ethernet cable yet nothing I tried worked!
PoE Dilemma
After visiting the Waveshare website, I found that the CM4 Mini Baseboard C does not support PoE. It was a massive shame, but the official baseboard for the CM5 seems to support PoE to some extent, according to The Pi Hut’s listing. So it may support PoE, just not out-of-the-box. It’s fine, I’m happy to spare a few pennies on a HAT at some stage to enable PoE and it’s not a massive requirement at the minute, but will be useful when I buy a switch with more Ethernet ports and have all my Ethernet-enabled devices connected.
Fashioning a Case and NVMe Drive
Now, I had the CM5 module installed on the official board. I quickly fashioned a case using the cardboard box it came in. It doesn’t look too bad but it doesn’t look great either! I was also able to install a 128GB NVMe drive I bought, it’s a 2280 so it didn’t fit in the Waveshare board which only supports a max of 2240, so maybe it was a happy accident it didn’t support PoE after all. I’d never used NVMe before, so I was keen to test it and I couldn’t believe the difference. The CM5 boots to login within seconds! Faster than my main development machine (an Intel i5 Dell Optiplex I grabbed off eBay last year and put 8GB of RAM in). Awesome.

Ideas, envisioned
My main idea with the CM5 was to utilize it as a development server, or a home development network (I thought of this name and decided it suited quite well), which uses Docker, Kubernetes et al., to create containerized environments for any and all development projects I have in the future. Using the write speeds of the NVMe and the 4GB of RAM (yes, half the amount of my main machine but still sufficient) I can use the power of the CM5 to develop locally, while still developing remotely over SSH on my main development machine in sandbox environments that are completely safe and unrestricted, as well as the ability to develop applications that require specific environments to run.
Thoughts on OS
I did debate for some time over whether to use Ubuntu or Raspbian. As a long-time Ubuntu (and Kubuntu) user, I really did sway towards using Ubuntu but reasoned that as the Pi OS is developed solely for the Pi/CM, it would be best to utilize that. I won’t see much of it graphically anyways, but could do if I wanted to given the choice. Ubuntu Server does not give me that choice so I stuck with Raspbian for power, processing, and support, as well as the option of having a graphical interface if I ever choose to use it.
Final Thoughts
Exploring the Compute Module 5 has been an exciting adventure, and I look forward to uncovering even more potential and seriously unlocking its power. I highly recommend them to anyone who is interested in Linux, Pi, embedded systems, etc. I wouldn't suggest them to a novice,or someone with little experience so if this is you, I'd start out with a Pi 4 or Pi 5 first. Until next time, Dru xo
Compute Module 5 Specifications:
- Form Factor: 55 mm x 40 mm x 4.7 mm
- Processor: Broadcom BCM2712 Quad-Core Cortex-A76 @ 2.4GHz
- Memory Options: 2GB, 4GB, 8GB LPDDR4-4267 SDRAM with ECC
- Storage Options: eMMC: 0GB, 16GB, 32GB, or 64GB
- Connectivity:
- Gigabit Ethernet PHY supporting IEEE 1588
- Bluetooth 5.0, BLE
- Wi-Fi 802.11 b/g/n/ac
- 1 × USB 2.0 port (high speed)
- 2 × USB 3.0 ports (supporting simultaneous 5Gbps operation)
- Up to 30 × GPIO supporting either 1.8V or 3.3V signalling
- Up to 5 × UART
- Up to 5 × I2C
- Up to 5 × SPI
- 1 × SDIO interface
- 1 × DPI (parallel RGB display)
- 1 × I2S
- Up to 4 × PWM channels
- Up to 3 × GPCLK outputs
- 2 × HDMI 2.0 ports (supports up to 4Kp60 on both ports simultaneously)
- 2 × 4-lane MIPI ports supporting both DSI (display port) and CSI-2 (camera port)
- Video Support: H.265 (4Kp60 decode), OpenGL ES 3.1 graphics, Vulkan 1.2
- Power: 5V (up to 5A with USB-C PD)